Recessed Diffuser Screw Kit - Version 2
Recessed Diffuser Screw Kit - Version 2
Regular price
$49.00 USD
Regular price
Sale price
$49.00 USD
Unit price
per
Couldn't load pickup availability
- Fits ONLY La Marzocco Saturated Group Head machines (Slayer, La Marzocco, Synesso, Modbar, Mavam, Unica Pro espresso machines)
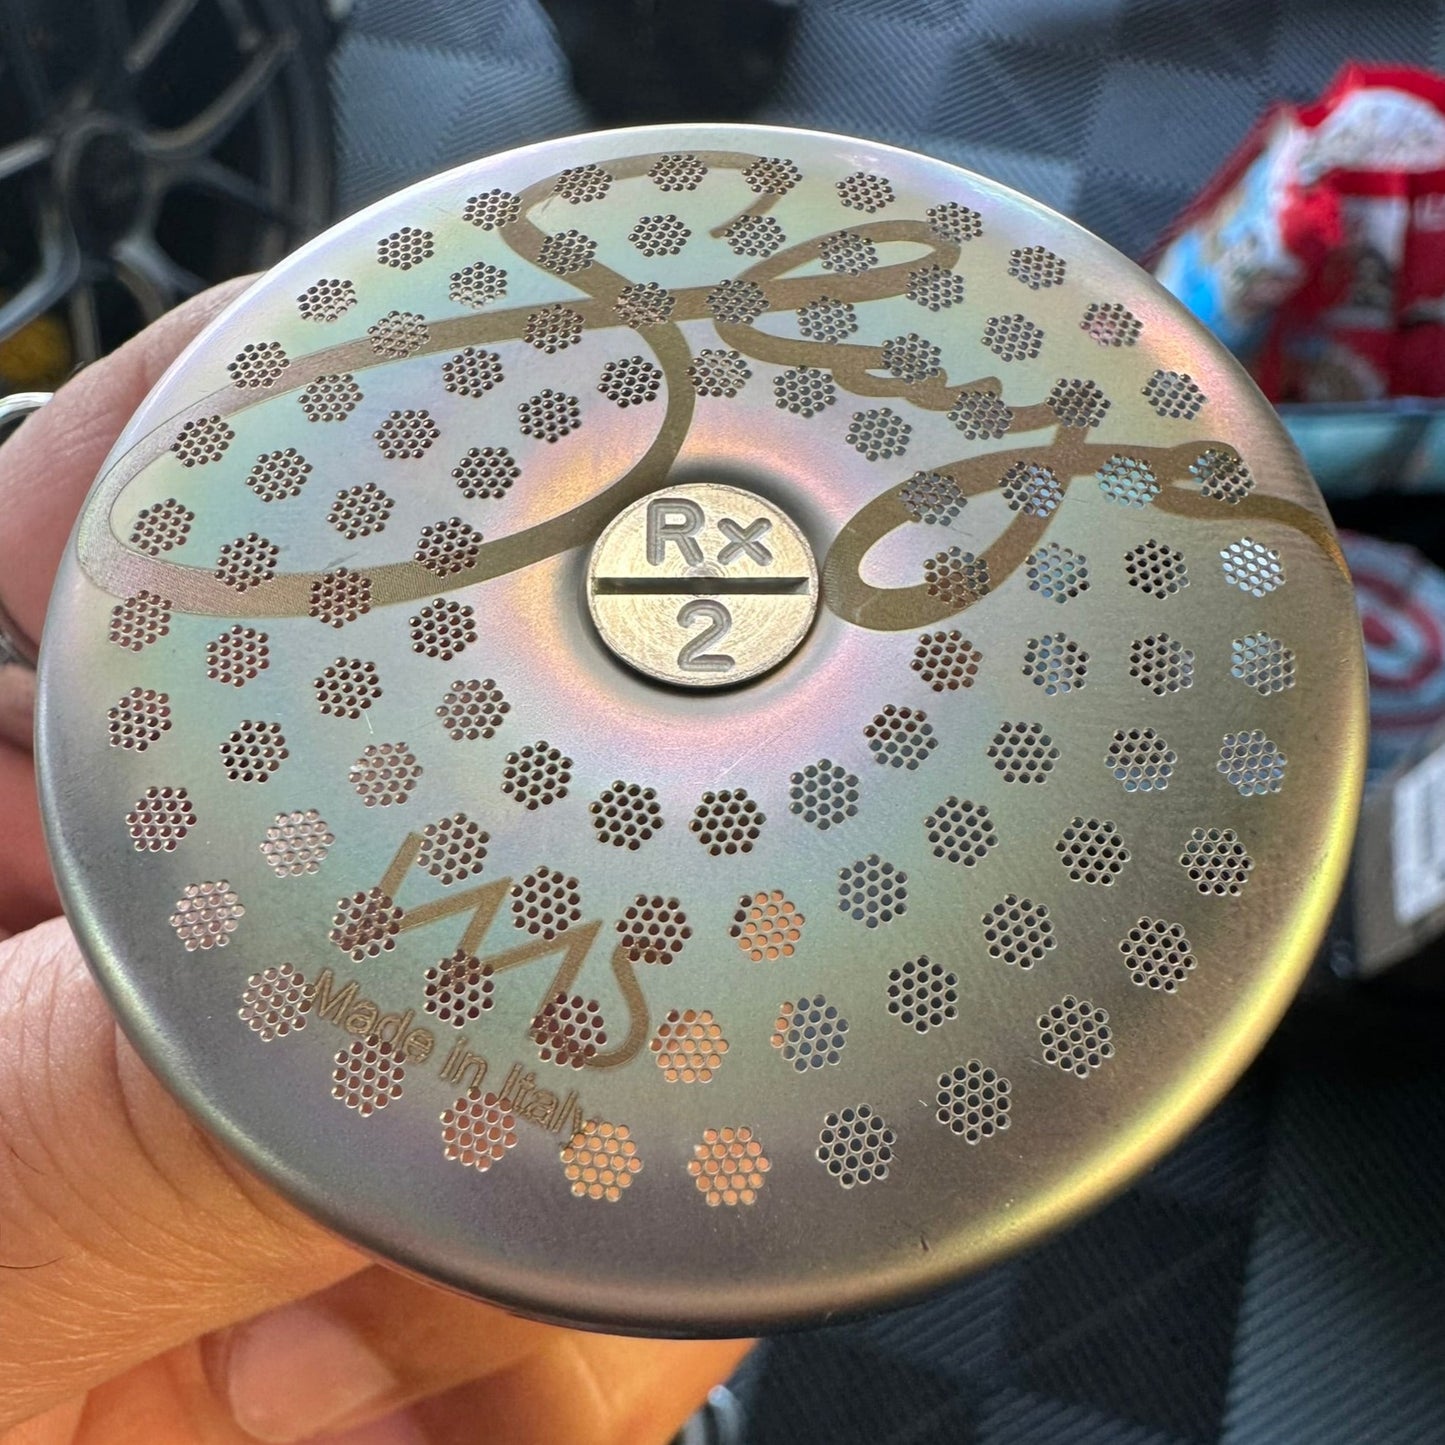
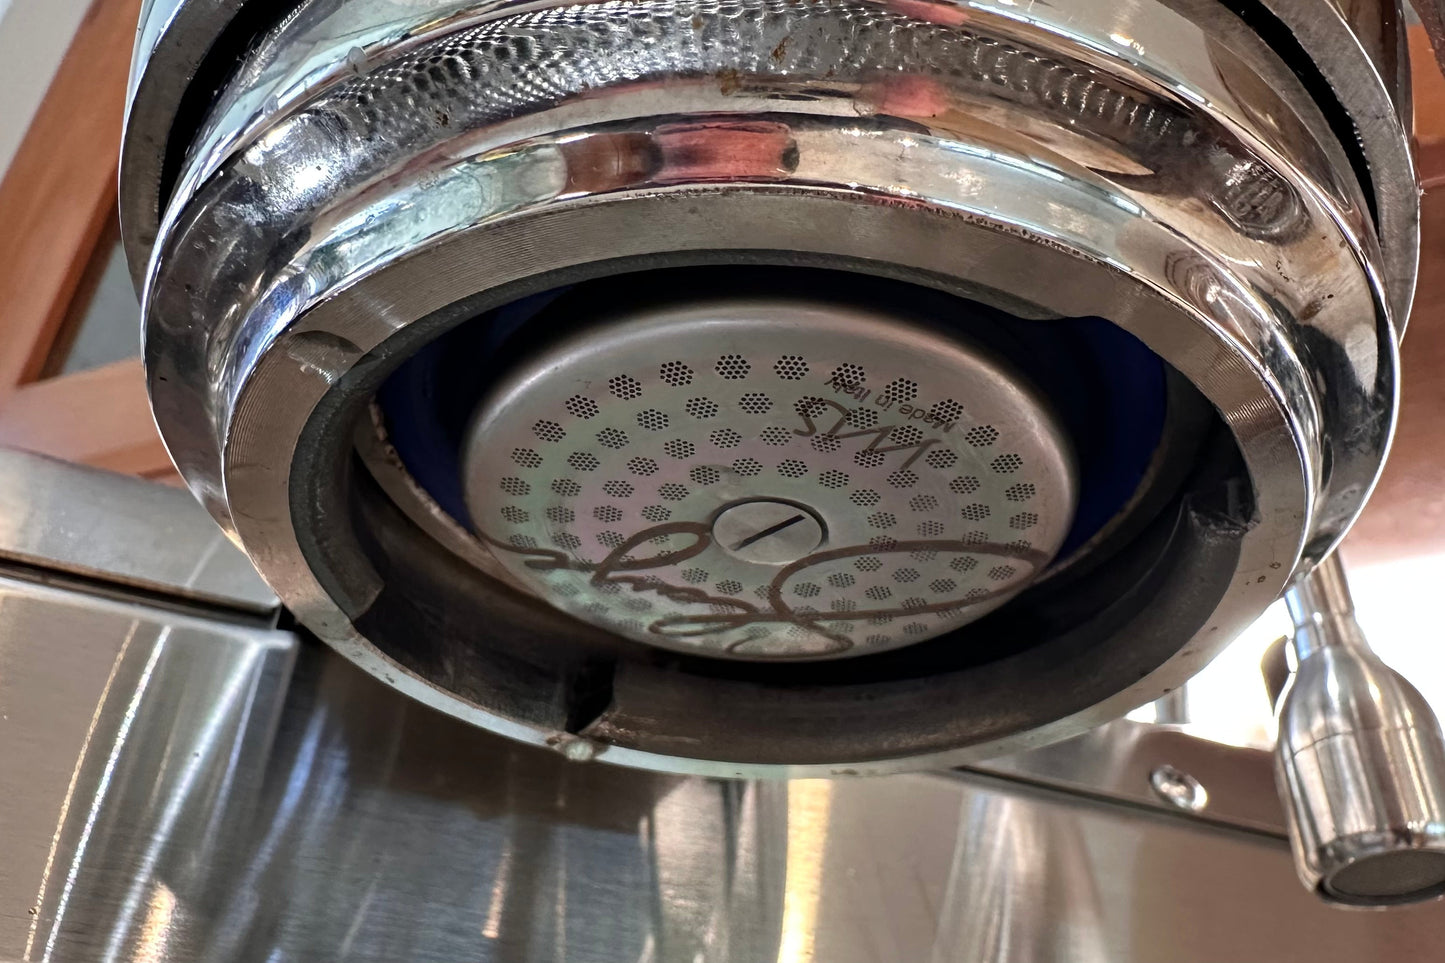
- Reforms your existing group head shower screen to accept a newly machined, completely recessed water distribution/retaining screw.
- Removes the intrusion of the screw head into the headspace of the espresso puck. Now, the puck interfaces with a flat shower screen, as is the case with every other group head on the market. Allows for the use of both thick and thin puck screens without damaging them.
- With Version 2, incorporated a unique water distribution design to constrain water flow to the mid-belt of the shower screen/puck at low flow rates when the head is not filled with water (pre-brew), allowing for biased initial wetting during pre-infusion. This greatly reduces side bypass and side channeling in my (and others') testing. This effect is thought to be neutralized once the head is filled and the group is pressurized (full brew).
- Most importantly, it allows for the option of up-dosing to proper, minimal headspace to improve espresso body.
- Shower screen NOT included
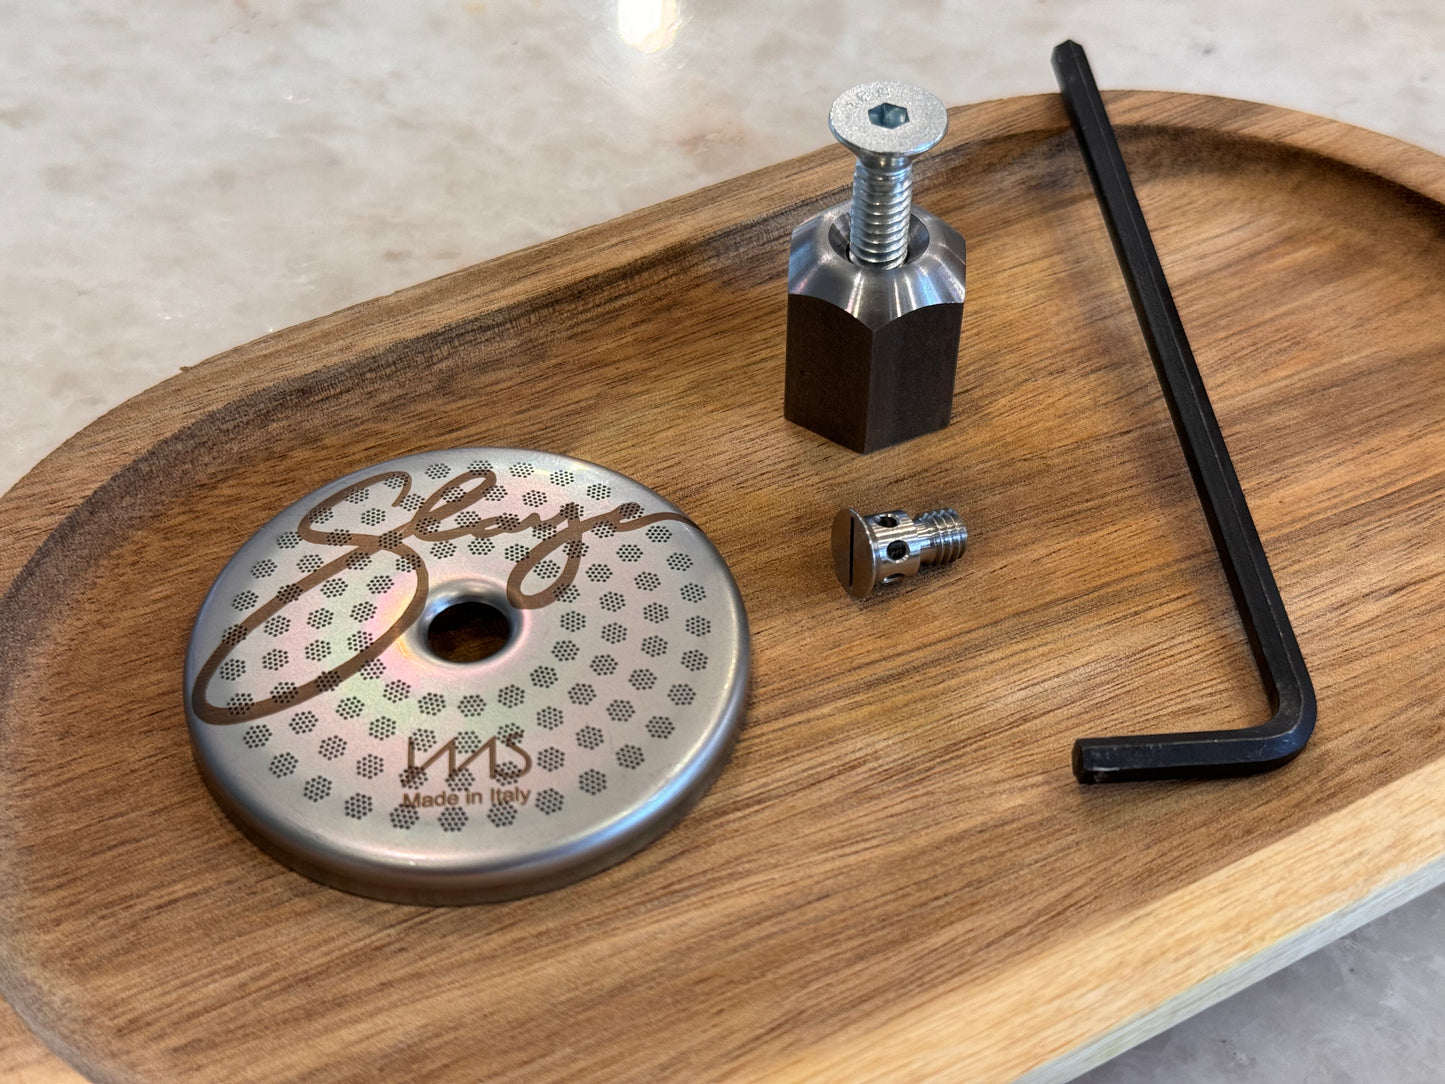
- Package includes:
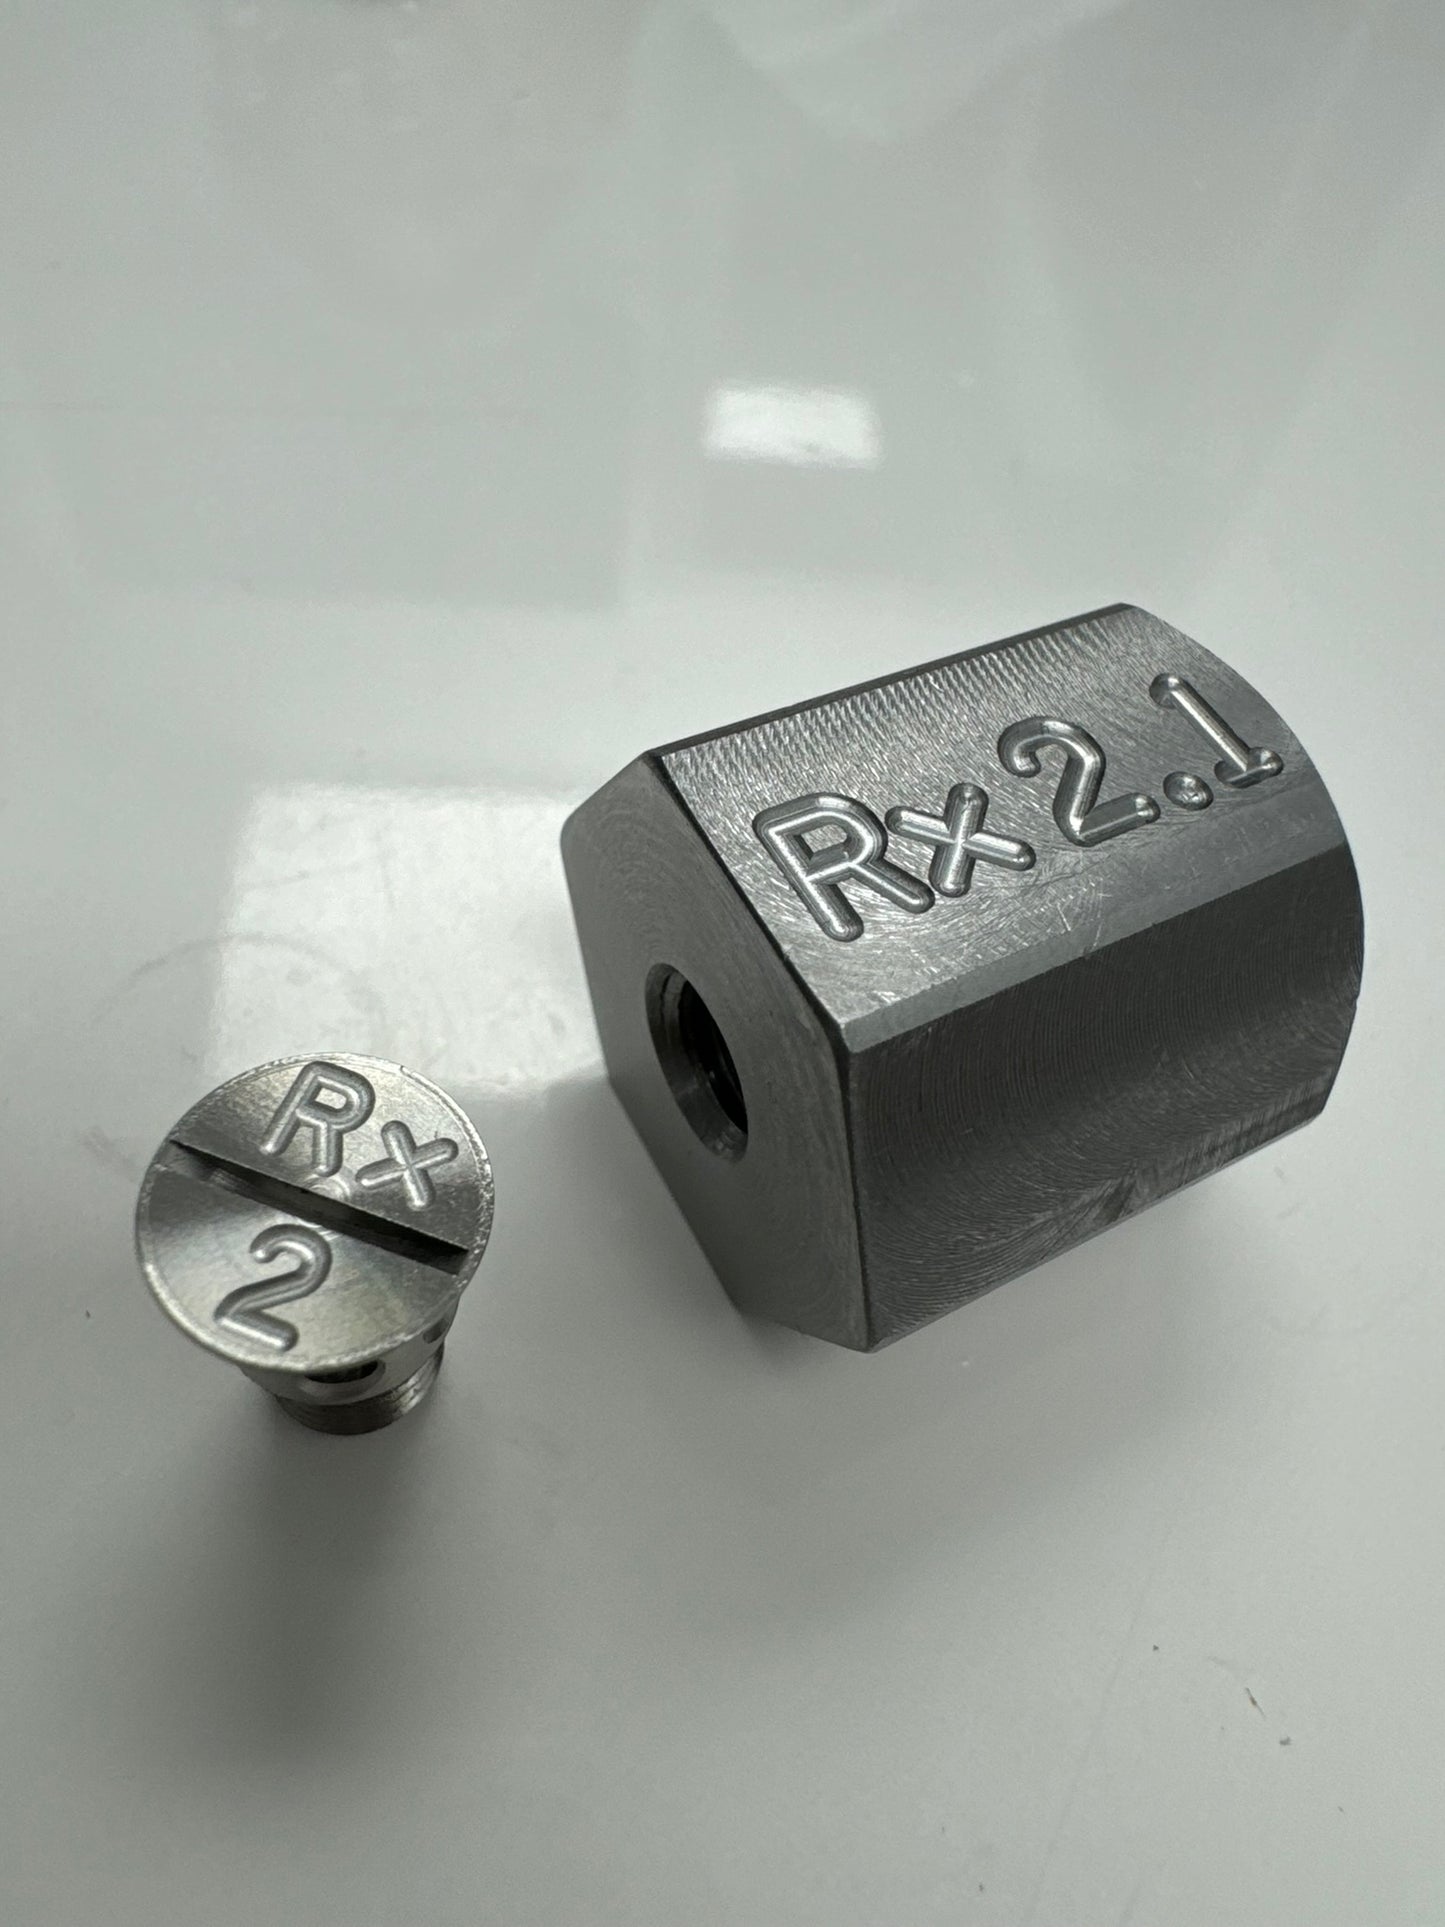
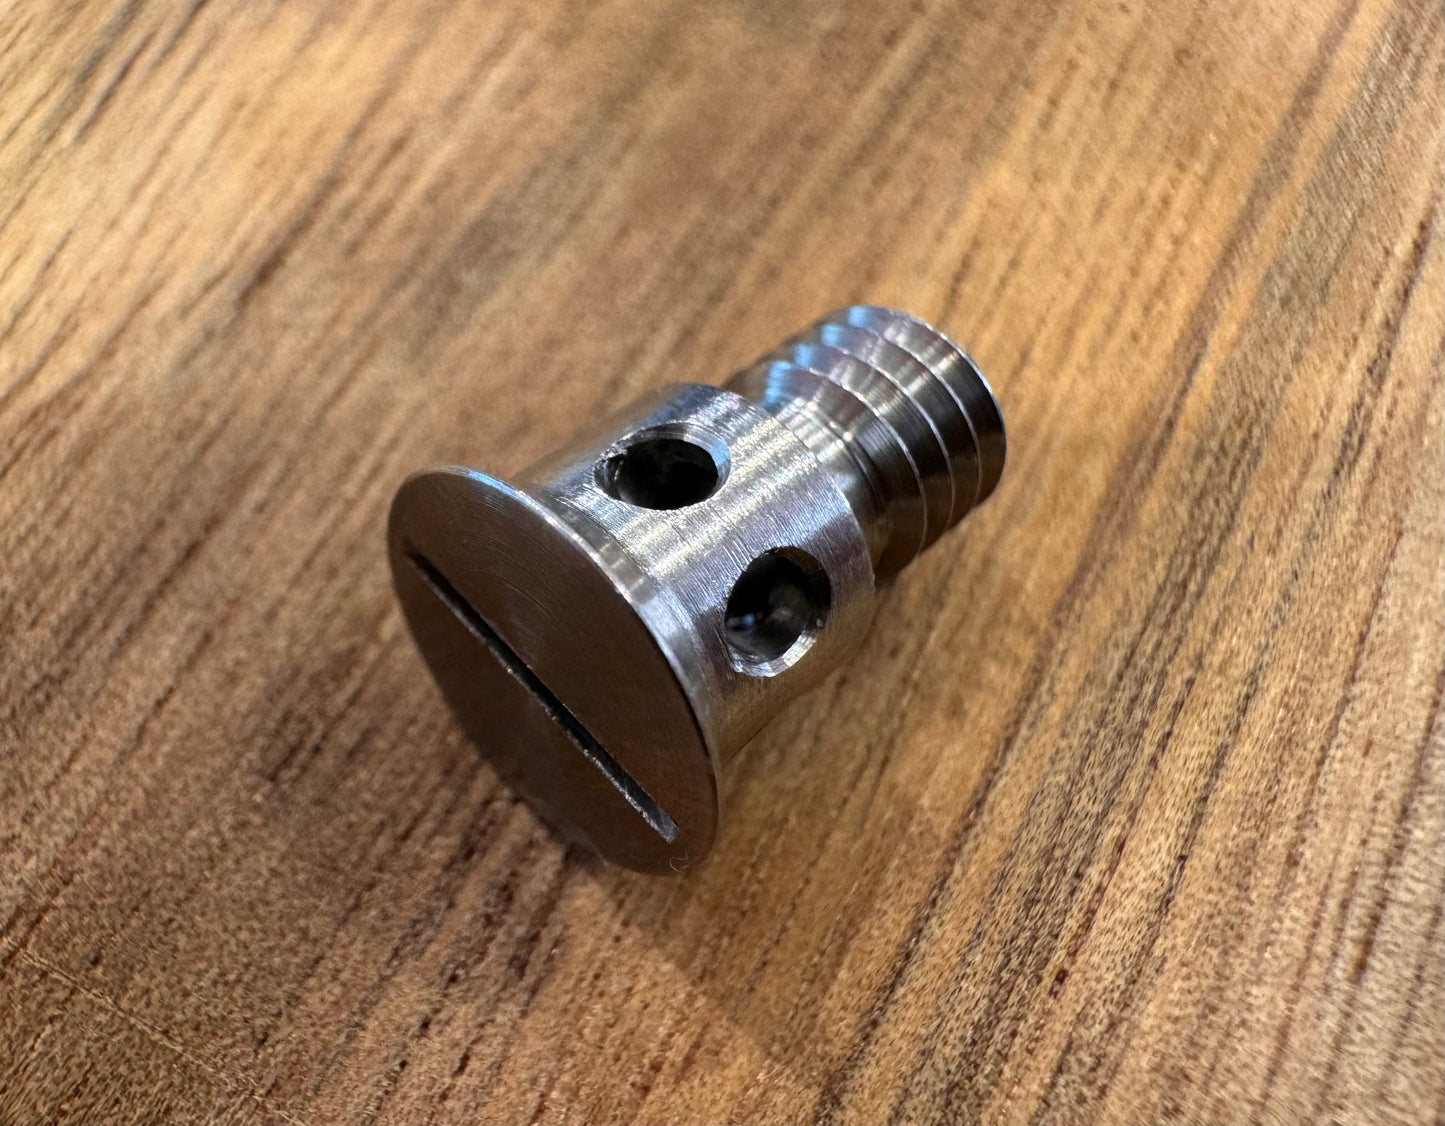
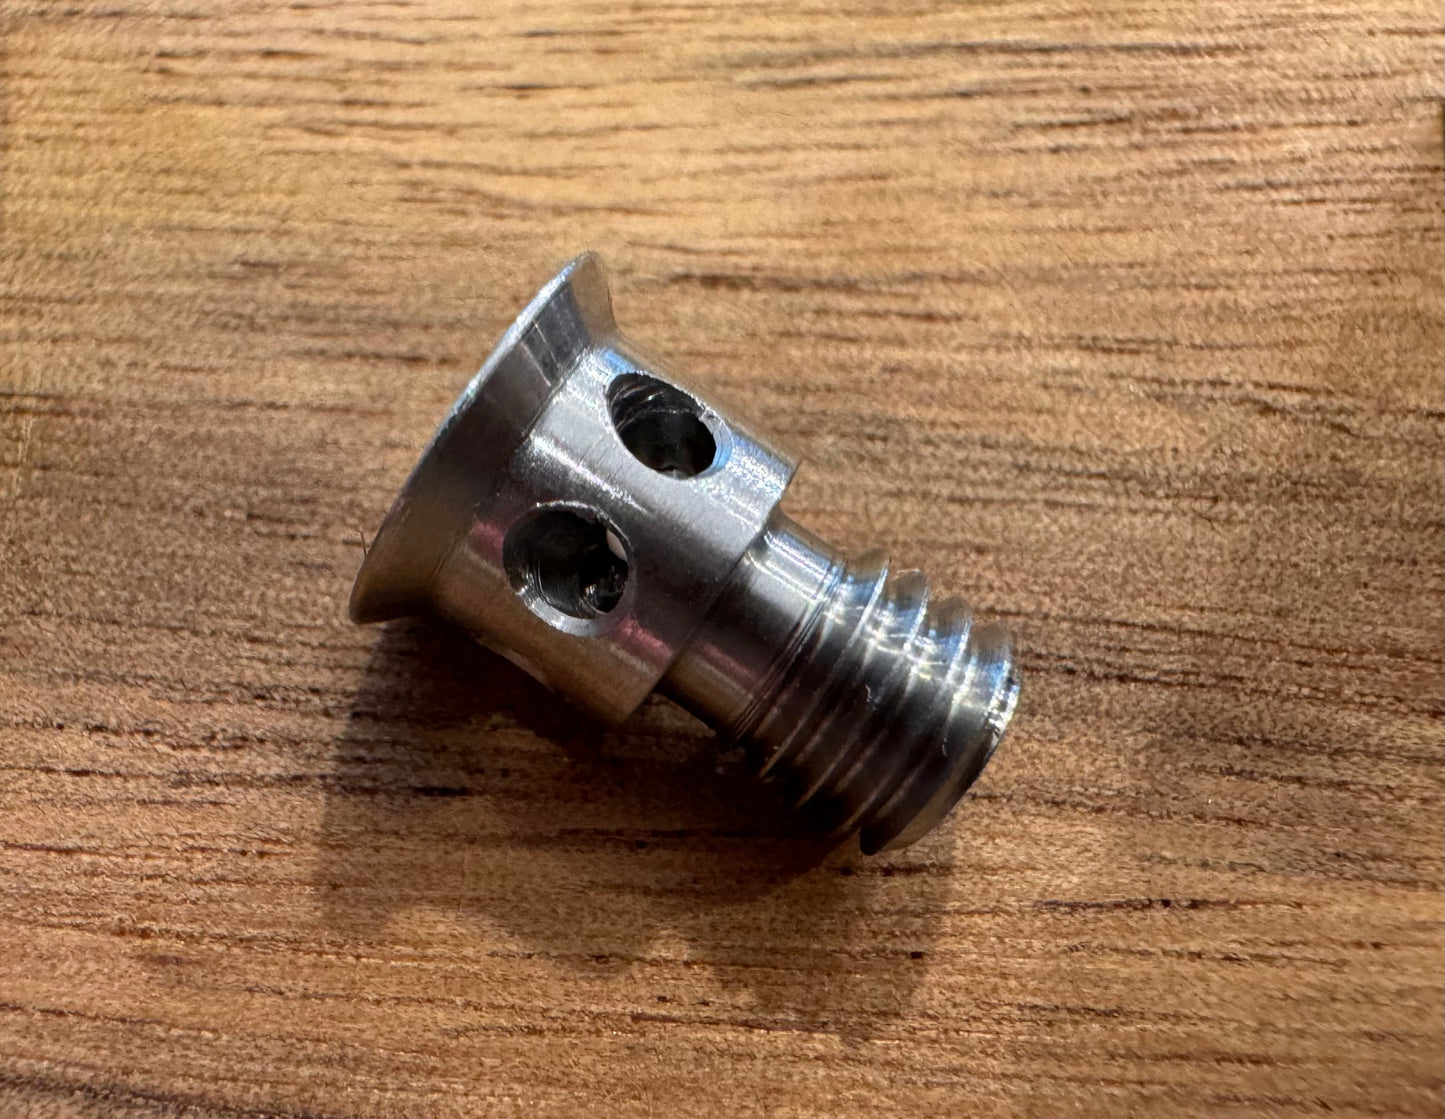
- Diffusion/retaining screw (316 Stainless Steel, M6x1.0mm)
- Forming/countersink die (12L14 Carbon Steel)
- Forming/countersink machine screw (Zinc-Plated Alloy Steel Hex Drive 1/4"-20 Thread Size, 1" Long)
- Hex L-Key (black oxide steel)
- Screwdriver (small) for driving/tightening screw into group head)
- Required Tools (NOT INCLUDED)
- 3/4" or 19mm wrench/spanner or bench vise
- Designed and manufactured by a coffee enthusiast for the coffee community in Los Angeles, California.
- If you purchase MORE than one screw, you will be shipped ONE forming kit only, and multiple screws, and the additional screws will be offered at a 20% discount.
Instructions:
- Do NOT use the diffuser screw itself to countersink/form your existing shower screen
- Use ONLY the provided die, large zinc-plated machine screw, and Allen key to form the screen
- Refer to the video in addition to the written instructions below to assist in making the modification
- Unscrew the forming screw from the die (if the two are not already separated).
- Use a bench vise or a large box wrench (19mm, or 3/4") to hold the die in place. Use of the bench vice is vastly preferred. The die, when held in place, should have its counter sink receiving side facing upwards.
- Place the forming screw through the screen with the screen facing up.
- Screw into the female threads forming die by hand until the screw snugs up against the screen.
- Insert the Allen key onto the screw head.
- The steps that follow need to be performed carefully and in step-wise, methodical fashion. Turning the Allen key and the screw will begin to deform the screen and form the desired counter sink into the shower screen. The objective is to match the counter sink to the head of the diffuser screw. Use a spare screen if possible.
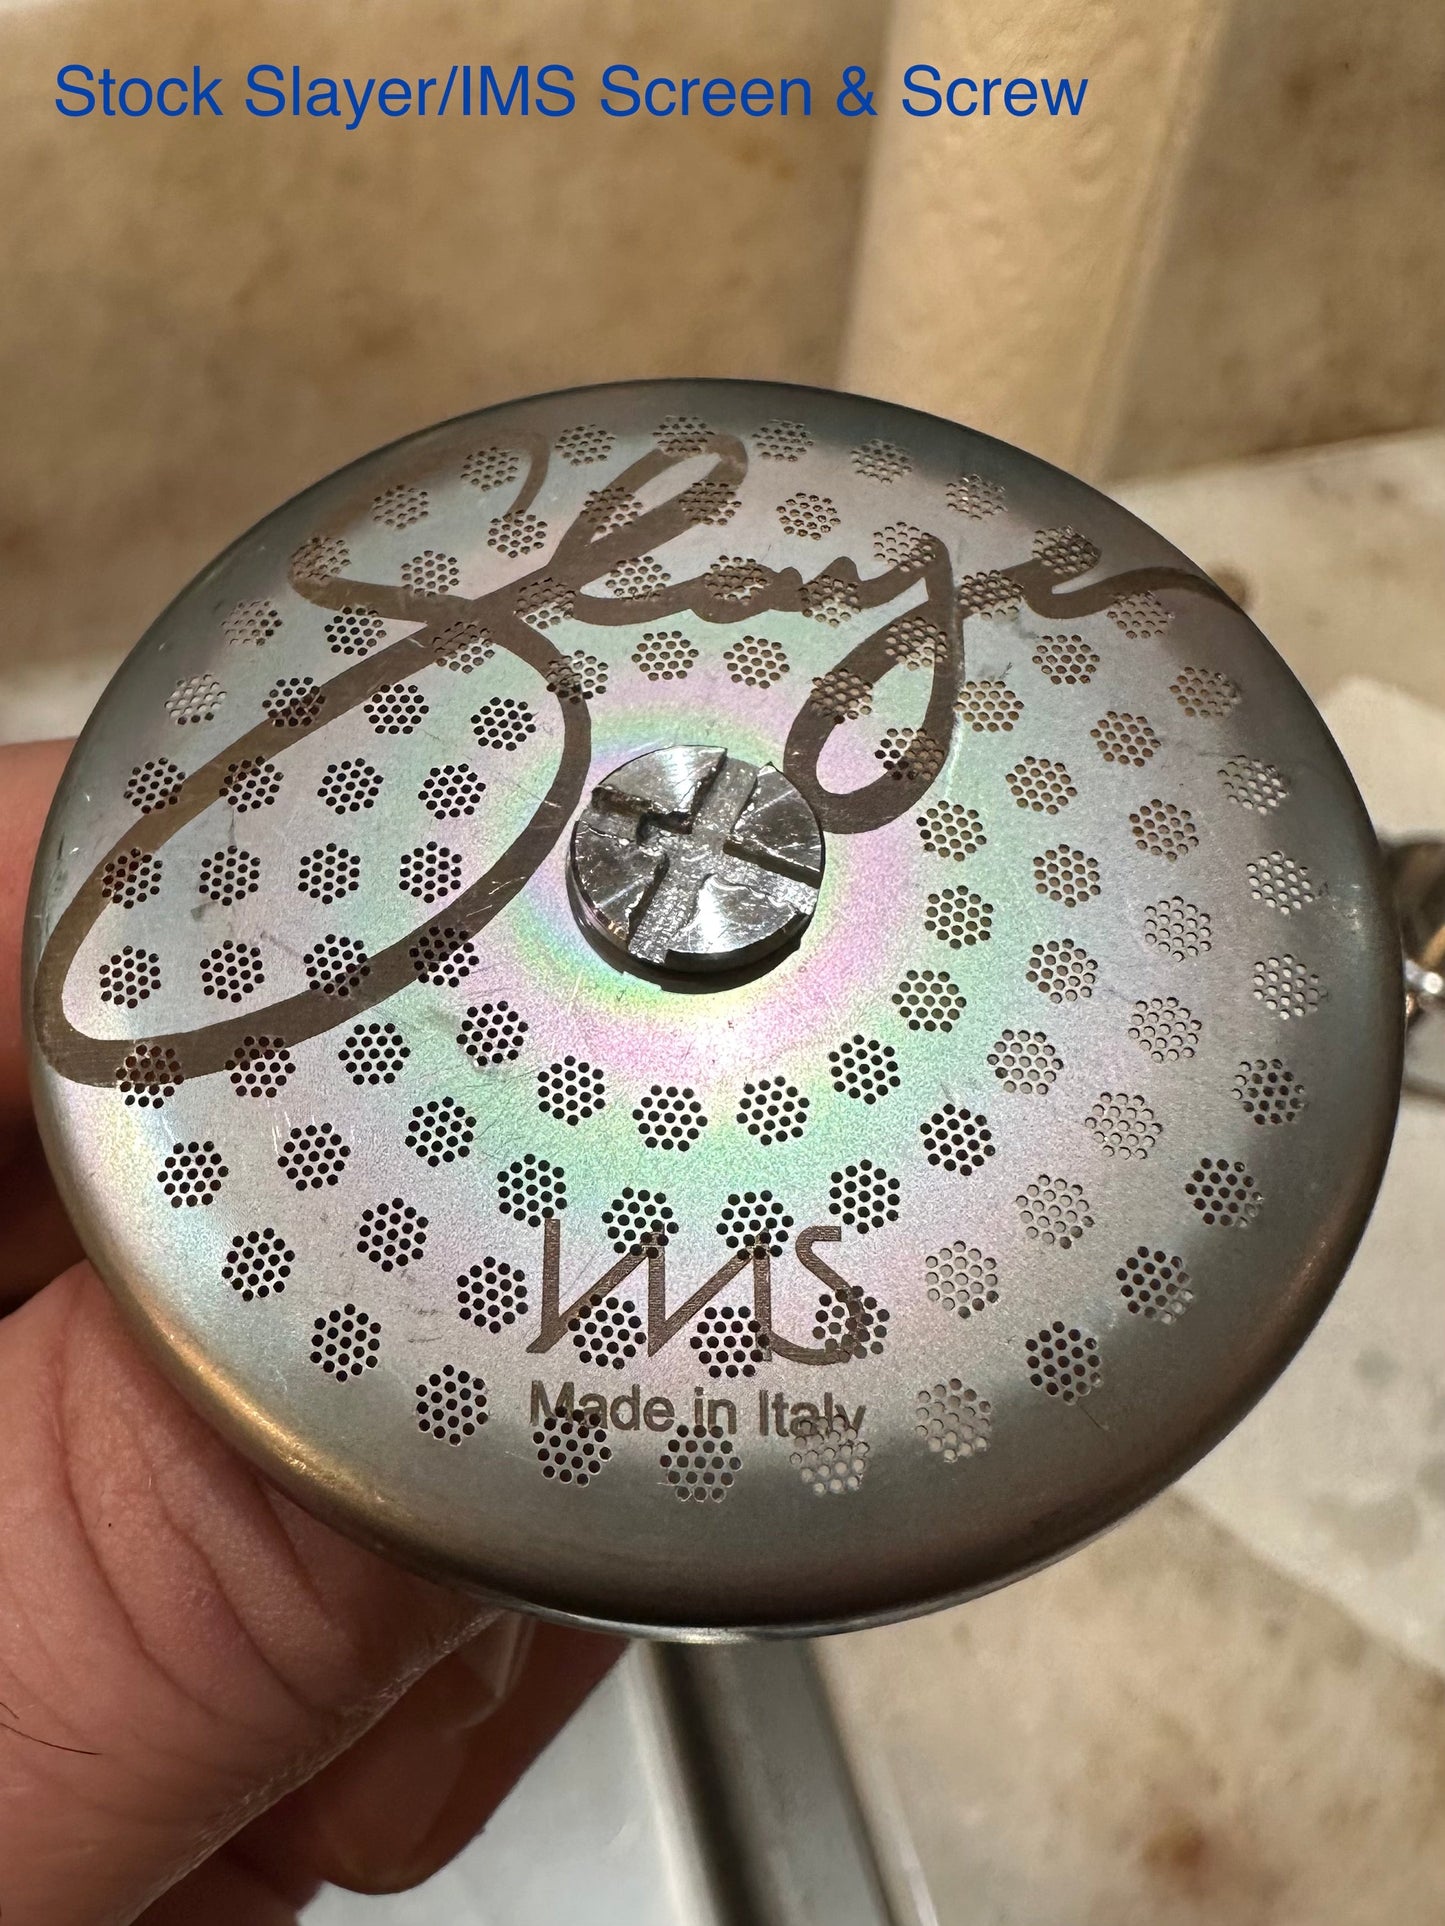
- Because there are both thin as well as thick screens available on the market, the size and exact shape of the countersink space (on the forming die) was designed to be universal and accommodate the thicker La Marzocco/E&B Labs screens as well the thinner Slayer/IMS screens. Additionally, the amount of force required to bend the metal of the screen is different for each.
- I can only provide approximate degrees (which translates into the applied force discussed above) by which you need to turn the forming screw to achieve the desired form. For this reason, the thinner screen will require much less force and travel (as described below) then the “full turn until it stops” turning of the screw.
- To be safe, start by turning the screw 120°. Removing the forming screw and the screen, and test the fitment of the diffuser screw in the counter sink. If the head is not completely flush with the surface, as per pictures provided, re-insert the forming screw and further bend the screen by turning the Allen key/screw additional 30-45° at a time, testing the fitment at each trial, until the desired depth is achieved.
- In our testing, the thinner Slayer/IMS screens fully formed after 180° to 210° of rotation. The thicker La Marzocco/E&B Labs screens required 240°-360° of rotation.
- Enjoy, and thank you kindly!